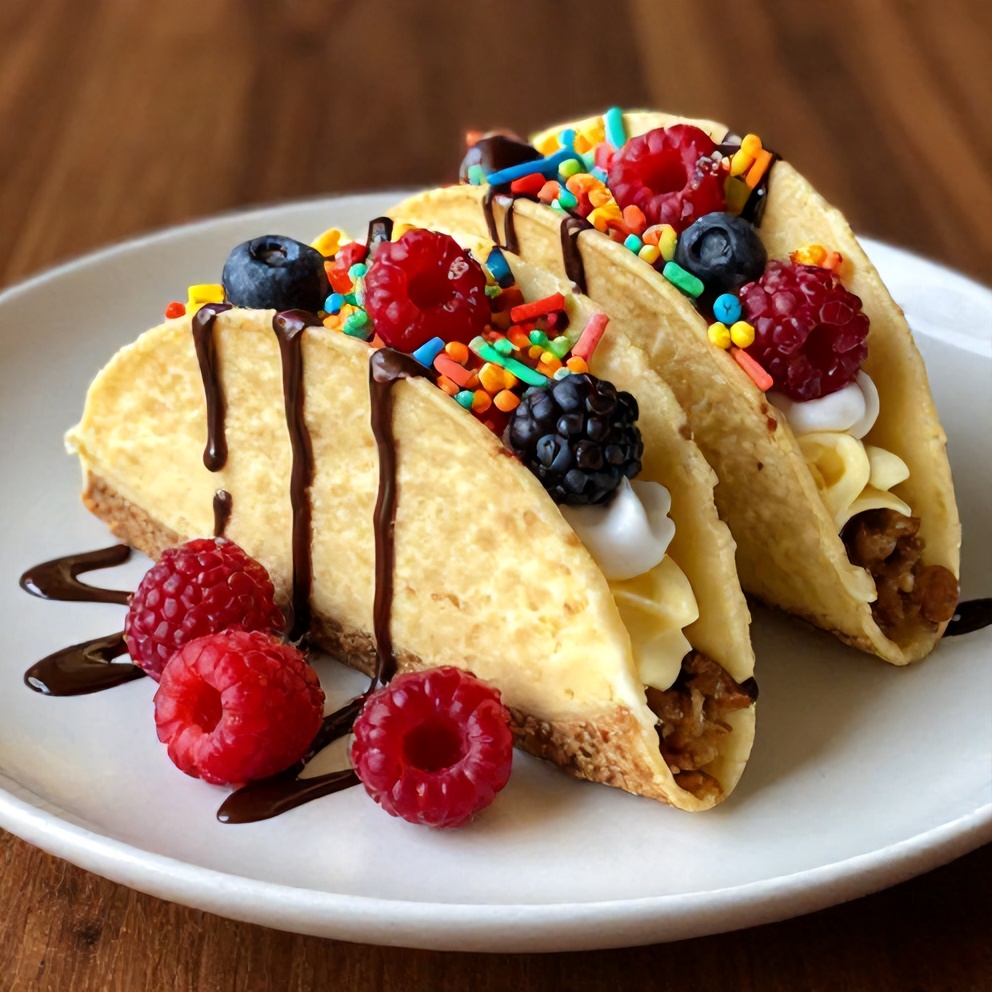
Fun and Easy Fruity Pebbles Cheesecake Tacos
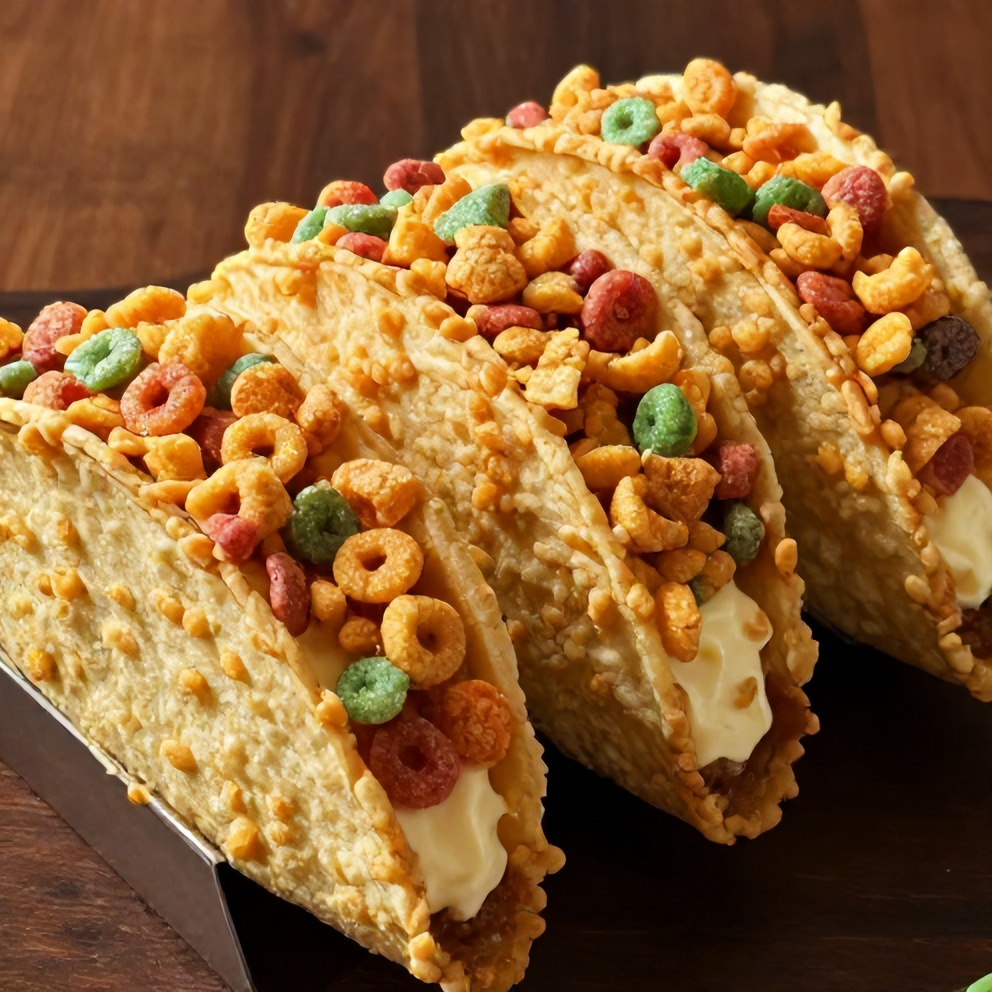
Love Fruity Pebbles cereal? Then you’ll go crazy for these **Fruity Pebbles Cheesecake Tacos**! After making these many times, I’ve discovered the trick to getting the perfect crispy cereal crust. Jump to the recipe or keep reading for my best tips. If you love recipes like this, you’ll also enjoy Refreshing Guava White Tea Lemonade Recipe for Summer and Creamy Pistachio Baklava Cheesecake Recipe.
Why This Fun and Easy Fruity Pebbles Cheesecake Tacos Is Pure Comfort
- Crispy Fruity Pebbles cereal crust
- Creamy no-bake cheesecake filling
- Easy to make and fun to eat
- Perfect for parties or a quick treat
What You'll Need for Fun and Easy Fruity Pebbles Cheesecake Tacos
Choosing the right ingredients makes a big difference, but this recipe is forgiving enough to work with what you have.
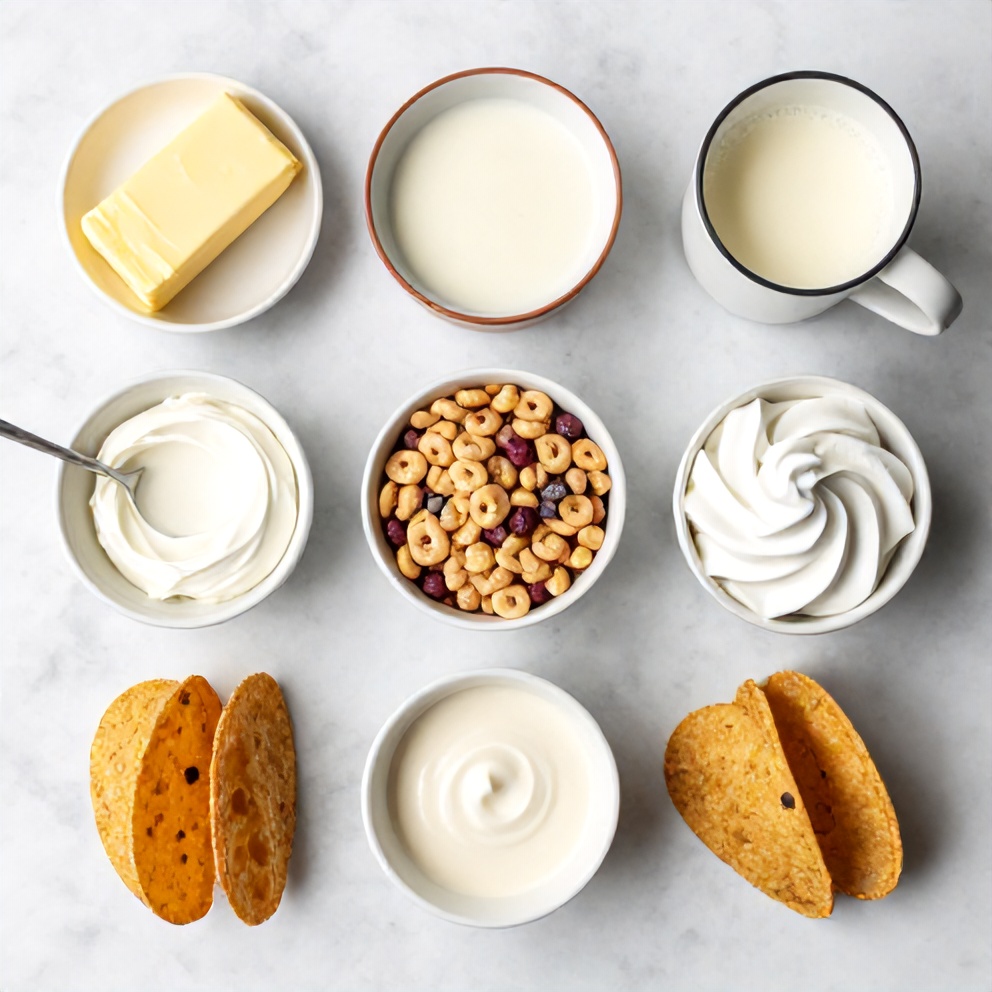
- Fruity Pebbles cereal
- Butter
- Cream cheese
- Sweetened condensed milk
- Vanilla extract
- Cool Whip
- Taco shells
- Sugar
- Vanilla extract
- Cool Whip
- Optional: Fresh berries
- Optional: Chocolate syrup
- Optional: Whipped cream
📝 Ingredient Notes
- Fruity Pebbles cereal: Use the full 6 oz box for the crust.
- Taco shells: You'll need 12 taco shells for this recipe.
🛒 Tools & Equipment I Recommend
- Food processor — Makes quick work of crushing cereal for the crust. → See on Amazon
- Stand mixer — Ensures a smooth, creamy cheesecake filling. → See on Amazon
How to Make Fun and Easy Fruity Pebbles Cheesecake Tacos
- Step 1: Crush Fruity Pebbles cereal and mix with melted butter. Press into taco shells and bake at 350°F for 5 minutes.
- Step 2: Beat cream cheese, sweetened condensed milk, and vanilla extract until smooth. Fold in Cool Whip.
- Step 3: Spoon cheesecake mixture into cooled taco shells. Add toppings and serve immediately.
Cook's Tips for Perfect Fun and Easy Fruity Pebbles Cheesecake Tacos
- Common mistake and fix: Don't overbake the cereal crust or it will become too hard to eat.
- Substitution tip: For a gluten-free version, use gluten-free taco shells and ensure your cereal is gluten-free.
- Make-ahead tip: Prepare the cereal crust and cheesecake filling ahead of time, but don't assemble until ready to serve.
- Presentation tip: Add a drizzle of chocolate syrup and a dollop of whipped cream for a fancy touch.
Storing & Reheating Fun and Easy Fruity Pebbles Cheesecake Tacos
Short-Term Storage
Store in an airtight container in the fridge. Store filled taco shells in the fridge until ready to serve. They can be made up to 2 hours ahead. Make-ahead tip: The cereal crust and cheesecake filling can be made ahead of time, but don't assemble until ready to serve.
Freezing Fun and Easy Fruity Pebbles Cheesecake Tacos
Not recommended as the cereal crust will lose its crispiness.
How to Reheat Without Drying It Out
Oven: Not necessary as these are best served cold. Microwave: Not recommended as it will make the cheesecake filling too soft.
Recipe Notes
- Chef tip: For a fun twist, try using different flavors of cereal for the crust.
- Best substitution: Substitute the Cool Whip with whipped cream for a lighter texture.
- Make-ahead: See storage notes for make-ahead tips.
- Scaling: This recipe can be easily doubled or tripled to serve a crowd.
- Troubleshooting: If your cheesecake filling is too thick, add a little milk to reach your desired consistency.
Want to level up this recipe?
Taco stand — Keeps taco shells upright while filling, preventing mess and making it easier to fill each one perfectly. → Check price on Amazon
Fun and Easy Fruity Pebbles Cheesecake Tacos
Ingredients
Main Ingredients
- Fruity Pebbles cereal
- Butter
- Cream cheese
- Sweetened condensed milk
- Vanilla extract
- Cool Whip
- Taco shells
Seasonings
- Sugar
- Vanilla extract
- Cool Whip
Optional Toppings
- Fresh berries
- Chocolate syrup
- Whipped cream
Instructions
- Step 1: Crush Fruity Pebbles cereal and mix with melted butter. Press into taco shells and bake at 350°F for 5 minutes.
- Step 2: Beat cream cheese, sweetened condensed milk, and vanilla extract until smooth. Fold in Cool Whip.
- Step 3: Spoon cheesecake mixture into cooled taco shells. Add toppings and serve immediately.
Notes
- Chef tip: For a fun twist, try using different flavors of cereal for the crust.
- Best substitution: Substitute the Cool Whip with whipped cream for a lighter texture.
- Make-ahead: See storage notes for make-ahead tips.
- Scaling: This recipe can be easily doubled or tripled to serve a crowd.
- Troubleshooting: If your cheesecake filling is too thick, add a little milk to reach your desired consistency.
Storage
- Fridge: Store filled taco shells in the fridge until ready to serve. They can be made up to 2 hours ahead.
- Freezer: Not recommended as the cereal crust will lose its crispiness.
- Oven reheat: Not necessary as these are best served cold.
- Microwave reheat: Not recommended as it will make the cheesecake filling too soft.
- Make ahead: The cereal crust and cheesecake filling can be made ahead of time, but don't assemble until ready to serve.
Nutrition Per Serving
- Calories: 320
- Protein: 4g
- Fat: 12g
- Carbs: 48g
- Fiber: 1g
- Sugar: 30g
- Sodium: 220mg
- Cholesterol: 35mg
- Sat. Fat: 7g
Nutritional values are estimates only. Actual values may vary by brand and portion size.
Fun and Easy Fruity Pebbles Cheesecake Tacos FAQs
See storage notes for make-ahead tips. It's best to assemble just before serving.
Add a little milk to reach your desired consistency. Beating the cream cheese and sweetened condensed milk thoroughly should also help prevent this.
Absolutely! Experiment with different flavors for a fun twist.
Use a taco stand to keep them upright and prevent mess.
Not recommended as the cereal crust will lose its crispiness.
A Warm Final Note
I can’t wait for you to try Fun and Easy Fruity Pebbles Cheesecake Tacos and see how effortlessly it comes together. When you make it, pop back here and leave a rating or share how it turned out — I love hearing from you!