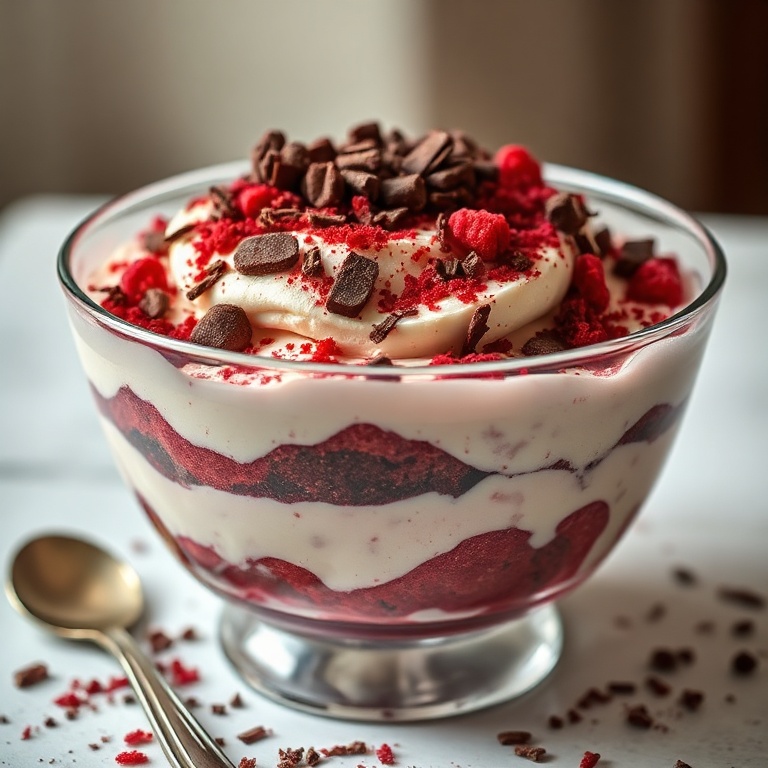
Easy Red Velvet Cheesecake Trifle
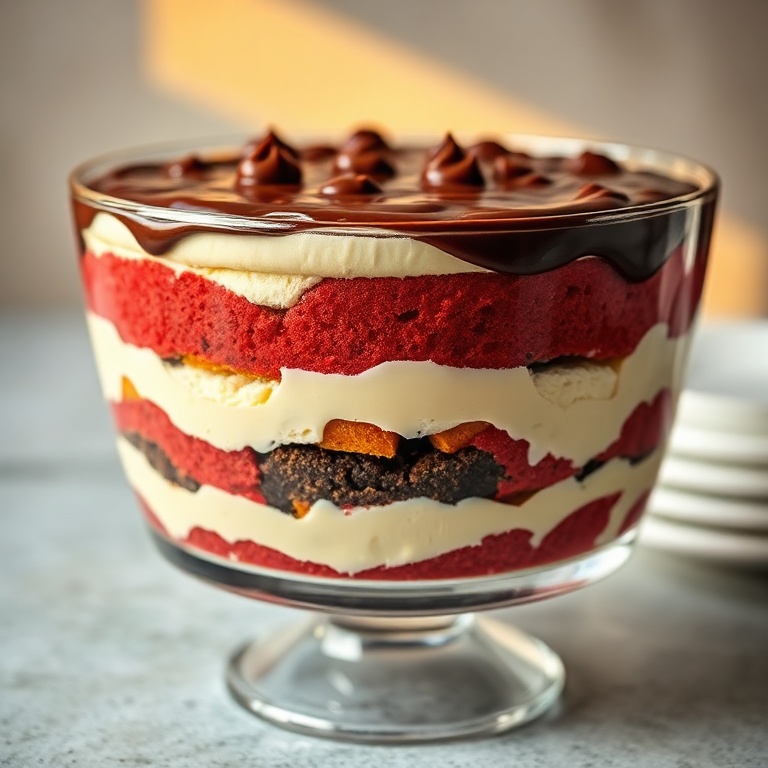
Easy Red Velvet Cheesecake Trifle is a creamy, layered dessert that’s easy to make. It solves the problem of needing a rich yet simple dessert for guests. After making this many times, I know the key to perfect texture is using full-fat cream cheese. The layers are creamy, rich, and melt in your mouth. Try my Rich Dark Chocolate Raspberry Cheesecake for more dessert ideas. If you love recipes like this, you’ll also enjoy Rich Dark Chocolate Raspberry Cheesecake and Soft Red Velvet Cookies.
Why This Easy Red Velvet Cheesecake Trifle Is Pure Comfort
- Layered textures and rich flavors
- Perfect for parties and gatherings
- Easy to make ahead of time
- Better than takeout
What You'll Need for Easy Red Velvet Cheesecake Trifle
Choosing the right ingredients makes a big difference, but this recipe is forgiving enough to work with what you have.
- 1 box red velvet cake mix
- 1 cup sour cream
- 1 cup heavy cream
- 12 oz cream cheese, softened
- 1/2 cup sugar
- 1/4 cup cocoa powder
- 1/4 cup hot water
- 1/2 cup chocolate ganache
- 1 tsp vanilla extract
- 1/2 tsp red food coloring
- Pinch of salt
- Optional: Fresh raspberries
- Optional: Chocolate shavings
- Optional: Red velvet cake crumbs
📝 Ingredient Notes
- Red velvet cake mix: Use a high-quality mix for best results
- Heavy cream: Chill before using for better texture
- Cream cheese: Soften before mixing for smoother results
🛒 Tools & Equipment I Recommend
- Silicone Trifle Bowl — Ensures even layering and easy serving → See on Amazon
- Digital Kitchen Scale — Accurate measurements for perfect texture → See on Amazon
How to Make Easy Red Velvet Cheesecake Trifle
- Bake Cake Layers: Preheat oven to 350°F. Mix red velvet cake as directed. Pour into 9-inch round pans. Bake 30-35 minutes. Cool completely.
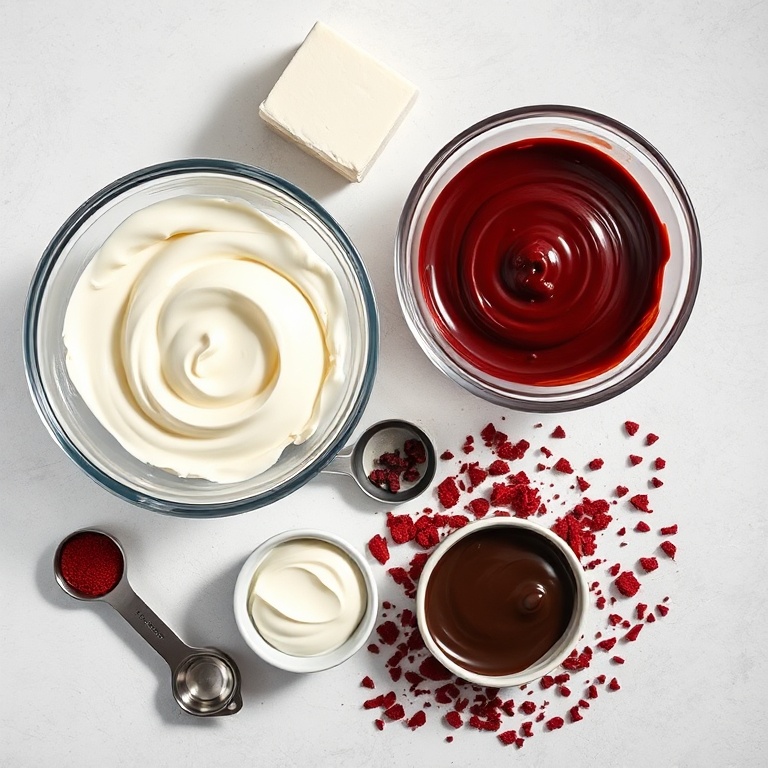
- Prepare Cheesecake Mixture: In a bowl, mix cream cheese, sour cream, sugar, and vanilla. Fold in whipped heavy cream.
- Make Chocolate Ganache: Heat heavy cream in a saucepan. Pour over chopped chocolate. Let sit 1 minute. Stir until smooth.
- Layer in Trifle Bowl: In a large trifle bowl, layer red velvet cake, cheesecake mixture, and ganache. Repeat layers.
- Chill and Serve: Refrigerate at least 2 hours. Top with raspberries or cake crumbs before serving.
Cook's Tips for Perfect Easy Red Velvet Cheesecake Trifle
- Texture trick: Use full-fat cream cheese for a richer, smoother texture
- Common mistake and fix: Overmixing can cause a dense texture. Mix just until ingredients are combined
- Flavor boost: Add a splash of coffee to the cake batter for deeper flavor
- Layering tip: Use a piping bag to create even layers of ganache for a more professional look
Storing & Reheating Easy Red Velvet Cheesecake Trifle
Short-Term Storage
Store in an airtight container in the fridge. Up to 3 days Make-ahead tip: Can be assembled 1 day ahead and chilled
Freezing Easy Red Velvet Cheesecake Trifle
Up to 1 month
How to Reheat Without Drying It Out
Oven: Preheat to 350°F. Warm in oven 10-15 minutes Microwave: Heat in 10-second intervals until warm
Recipe Notes
- Chef tip: For a deeper red color, add a splash of red food coloring to the cake batter
- Best substitution: Use buttermilk instead of sour cream for a tangy flavor
- Make-ahead: Assemble and chill up to 1 day before serving
- Scaling: Double the recipe for a larger trifle bowl
- Troubleshooting: If the ganache is too thick, add a splash of hot cream to loosen it
Want to level up this recipe?
Stand Mixer — Saves time and effort when mixing large batches → Check price on Amazon
Easy Red Velvet Cheesecake Trifle
Ingredients
Main Ingredients
- 1 box red velvet cake mix
- 1 cup sour cream
- 1 cup heavy cream
- 12 oz cream cheese, softened
- 1/2 cup sugar
- 1/4 cup cocoa powder
- 1/4 cup hot water
- 1/2 cup chocolate ganache
Seasonings
- 1 tsp vanilla extract
- 1/2 tsp red food coloring
- Pinch of salt
Optional Toppings
- Fresh raspberries
- Chocolate shavings
- Red velvet cake crumbs
Instructions
- Bake Cake Layers: Preheat oven to 350°F. Mix red velvet cake as directed. Pour into 9-inch round pans. Bake 30-35 minutes. Cool completely.
- Prepare Cheesecake Mixture: In a bowl, mix cream cheese, sour cream, sugar, and vanilla. Fold in whipped heavy cream.
- Make Chocolate Ganache: Heat heavy cream in a saucepan. Pour over chopped chocolate. Let sit 1 minute. Stir until smooth.
- Layer in Trifle Bowl: In a large trifle bowl, layer red velvet cake, cheesecake mixture, and ganache. Repeat layers.
- Chill and Serve: Refrigerate at least 2 hours. Top with raspberries or cake crumbs before serving.
Notes
- Chef tip: For a deeper red color, add a splash of red food coloring to the cake batter
- Best substitution: Use buttermilk instead of sour cream for a tangy flavor
- Make-ahead: Assemble and chill up to 1 day before serving
- Scaling: Double the recipe for a larger trifle bowl
- Troubleshooting: If the ganache is too thick, add a splash of hot cream to loosen it
Storage
- Fridge: Up to 3 days
- Freezer: Up to 1 month
- Oven reheat: Preheat to 350°F. Warm in oven 10-15 minutes
- Microwave reheat: Heat in 10-second intervals until warm
- Make ahead: Can be assembled 1 day ahead and chilled
Nutrition Per Serving
- Calories: 350
- Protein: 6g
- Fat: 18g
- Carbs: 35g
- Fiber: 1g
- Sugar: 18g
- Sodium: 150mg
- Cholesterol: 85mg
- Sat. Fat: 12g
Nutritional values are estimates only. Actual values may vary by brand and portion size.
Easy Red Velvet Cheesecake Trifle FAQs
Yes, assemble and chill up to 1 day before serving. The flavors will deepen with time.
Overmixing the cheesecake mixture can lead to a dense texture. Mix just until combined. Also, ensure the cake layers are fully cooled before layering.
Yes, wrap tightly in plastic wrap and freeze for up to 1 month. Thaw in the fridge before serving.
Use high-quality ingredients and take time to layer properly. A professional trifle bowl and fresh toppings elevate the presentation.
Use a homemade red velvet cake recipe or a yellow cake mix with added cocoa and red food coloring.
A Warm Final Note
I can’t wait for you to try Easy Red Velvet Cheesecake Trifle and see how effortlessly it comes together. When you make it, pop back here and leave a rating or share how it turned out — I love hearing from you!